okay, here is the how-to I promised.
these are the things you need in addition to the tools we used in basic wirewrapping.
chain
fish line or some kind of thread that is stiff but flexible(not in the pic)
clear nail polish(not in the pic)
clasp(not in the pic)
wire/jump ring(not in the pic)
①cut the embroidery thread in 50cm(~20inch)
②using a piece of fish line as a needle, thread it through a link of chain
and tie a lark's head knot: bring both ends through the loop
now, the thread is attached to the chain!
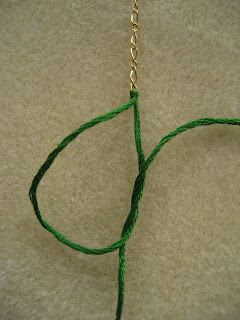
③vertical halt hitch
③vertical halt hitch
and bring the working end over then loop it around and back under the core end
continue knotting until it reaches the length you wish
- I made this one 4cm(1.6inch) long, total length of 16.8cm(6.6inch)
④tie a lark's head knot with the core end onto the other end of chain
④tie a lark's head knot with the core end onto the other end of chain
then tie a square knot
*do not use crazy glue, it tends to dry out the thread/cord
⑤put a clasp on the end of the chain to finish it off
- either wirewrap(simple loop & wrapped loop or use jumpring(o-shaped ring with a opening)
you'll have this cute bracelet on your wrist :)
make them in different colors and have fun!


No comments:
Post a Comment