I had worked at a bead store for a few years,
and I thought it would be nice to share some knowledge and techniques with you!
so, I am going to start with the basics today :)
first of all, these are the basic beading supplies you need for wire work.
left pic: from the most left-designing board(not necessary), beading mat, pliers, and wire(and of course beads!)
right pic: from the left- needle nose, round nose, and flush cutter
for the basic wire work, a lot of people use 24gauge wire.
(the highter the number, the thinner/skinier the wire)
here I used 22g, mid soft craft wire.
it's good to practice with craft wire first, and then move on to sterling silver or gold/fill
so that you don't waste precious metal.
I will start with:
SIMPLE LOOP
①cut the wire in about 3" length with the cutter
as you gain experience, you'll know how much wire you need for that particular bead.
②using the needle nose, bend the wire at 90°
③switch to the round nose, roughly estimate how much wire you need to make a loop
and start 'rolling' the wire towards the 90°-stem
do not over-roll! you want to keep the nice 90° on the bottom of the loop
then cut off the excess
(make sure that the end doesn't go flying off! cover with your fingers or cut it under a table)
if it looks like a 'P' shape, you rolled it too far
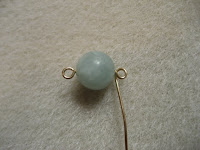
④put a bead on the stem wire, and repeat ①~③ to finish the other end
tadaaaa
here it is!
now you mastered simple loop :)


No comments:
Post a Comment